
Here it is! The garden decor you’ve been waiting for!
Today we’re going to show you how to build our infamous Wheelbarrow Flower Pot!
This simple project comes from just one single 6’ board! We’re going to use a cedar fence picket to keep it simple and affordable! Cedar is a good choice for this; since this project will sit outside with dirt, and will contain a lot of moisture in the wood. More on What woods last outside- here.
Before we can jump in we need to make sure we have everything ready so we can work efficiently. In addition to materials, you’ll need a few tools to complete this build, so we listed them out here.
Tools
Tape measure
Square and protractor (or speed square)
Pencil
Circular Saw/chop saw
Table saw
Sander
Drill (and impact)
⅛” drill bit (w/ optional countersink drill bit
4 ¼” hole saw (or jigsaw)
Materials
1- ⅝”x5 ½”x72” (standard fence picket or 1x6x6 planed down to ⅝” thickness)
23 ct.- 1” exterior grade screws
80 grit sandpaper (120 if painting)
Wood glue
2 ¼” long- ⅜” diameter dowel rod (optional)
To start I like to sand, well okay I don’t LIKE to sand, but I prefer doing it now cause it’s quicker and easier than sanding the individual pieces or the finished product. After we’ve given our board a good once over with some 80 grit sandpaper, it’s time to start cutting!
Pickets can vary slightly in size, so before we cut all our parts to length, we need to make sure the width of the board is a consistent 5 ½”. If it’s a little over you can just simply run the board through a table saw, or use your circular saw to rip it down.
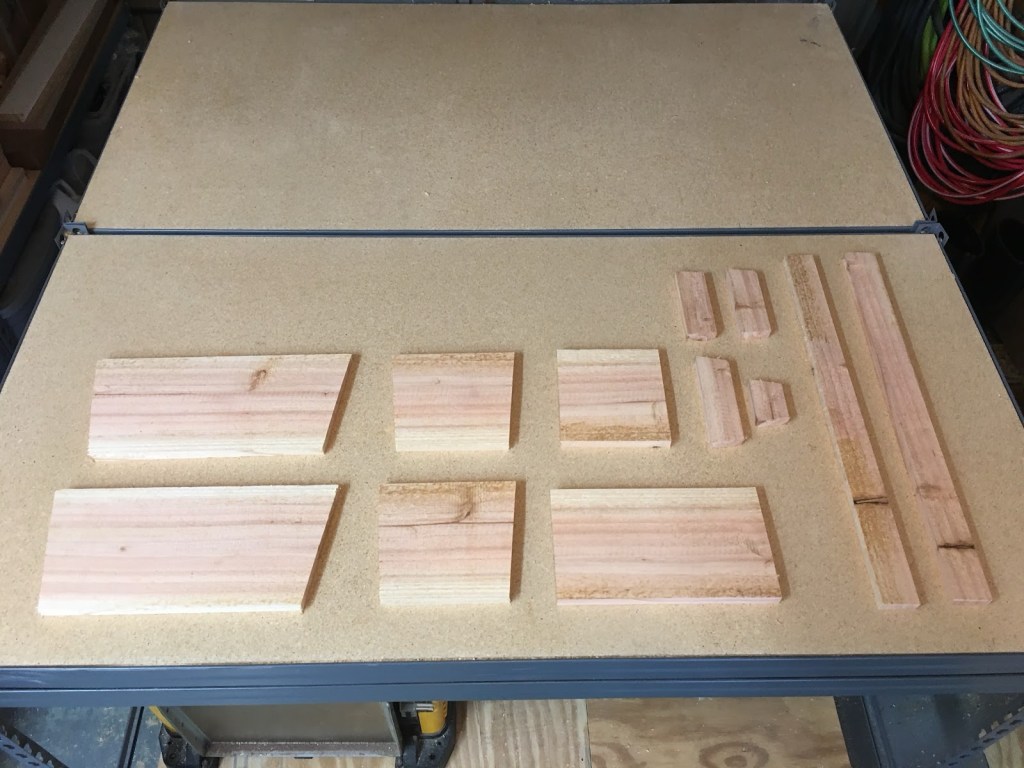
Now that we have a consistent width, it’s time to cut out our pieces. Cut your board down according to the cut order, once you’re done check back over the parts list to make sure you have everything.
Cut order
Remember, all these pieces will come from just one board! Be sure to measure from the square end, not the end with the dog ears (the corners cut off.)
At the miter saw
*using the 72”x 5 ½” board
- Cut 2- 12” pieces, with a 10 degree angle on each end
- Cut 2- 6” pieces with a 5 degree angle on each end
- Cut 1- 9” piece
- Cut 1- 5” piece
- Cut 1- 20” piece (remainder of board)
*if using dowel rod
- Cut 1- 2 ¼” piece with a 10 degree angle on each end (this will be used to attach the wheel but can be substituted for a couple screws)
At the table saw
- Rip the 20”x5 ½” piece down to 3- 1 3/4” wide pieces
- Rip the 9”x5 ½” piece down to 5 ⅛” wide
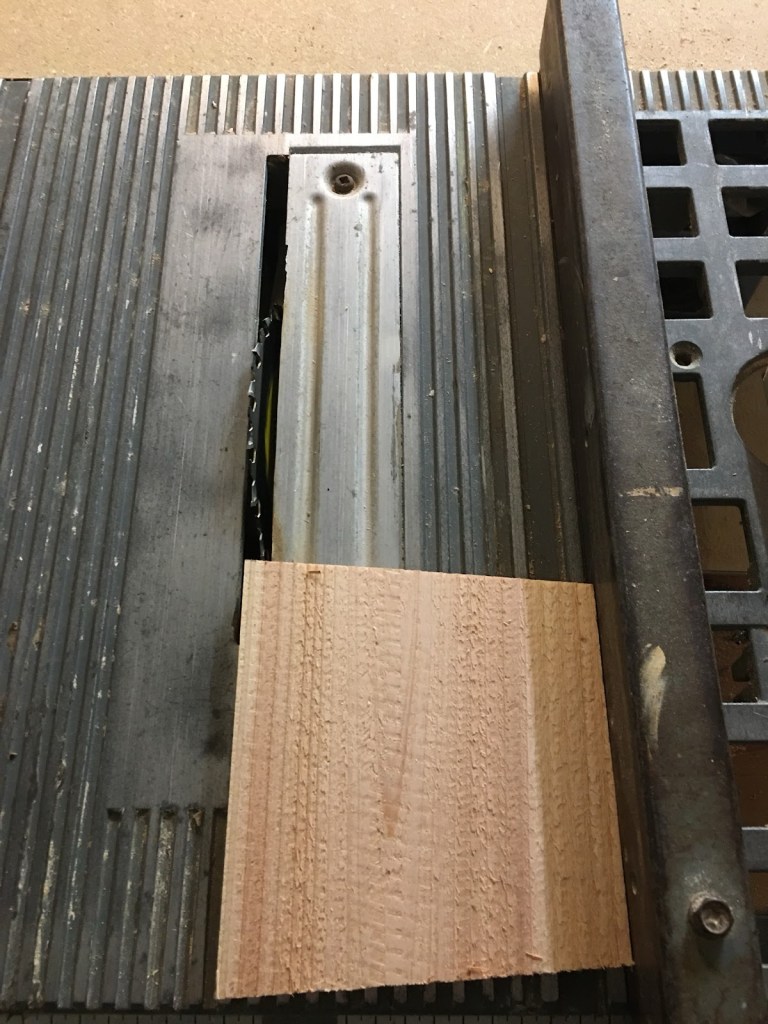
- Set the blade to a 10 degree angle and the fence to 5 ¼” and rip the top (long end) of the front and back pieces *pictured below
Back at the miter saw
*using one of the 20”x1 ½” pieces
- Cut 1- 5 ⅛” piece, with a 10 degree angle on each end
- Cut 1- 2 ½” piece, with a 10 degree angle on each end
- Cut 2- 4 ½” pieces with a 5 degree angle on each end
Parts list
Part A- 2- 12”x 5 ½” w/ 10 degree cut on each end (sides)
Part B- 2- 6”x 5 ½” w/ 5 degree cut on each end (front and back)
Part C- 1- 5”x5 ½” (wheel)
Part D- 1- 9”x5” (bottom)
Part E- 2- 20”x1 ½” (handles)
Part F- 1- 5 ⅛”x1 ½” (back cross brace)
Part G- 1- 2 ⅛”x1 ½” (front cross brace)
Part H- 2- 4 ¼”x1 ½” (legs)
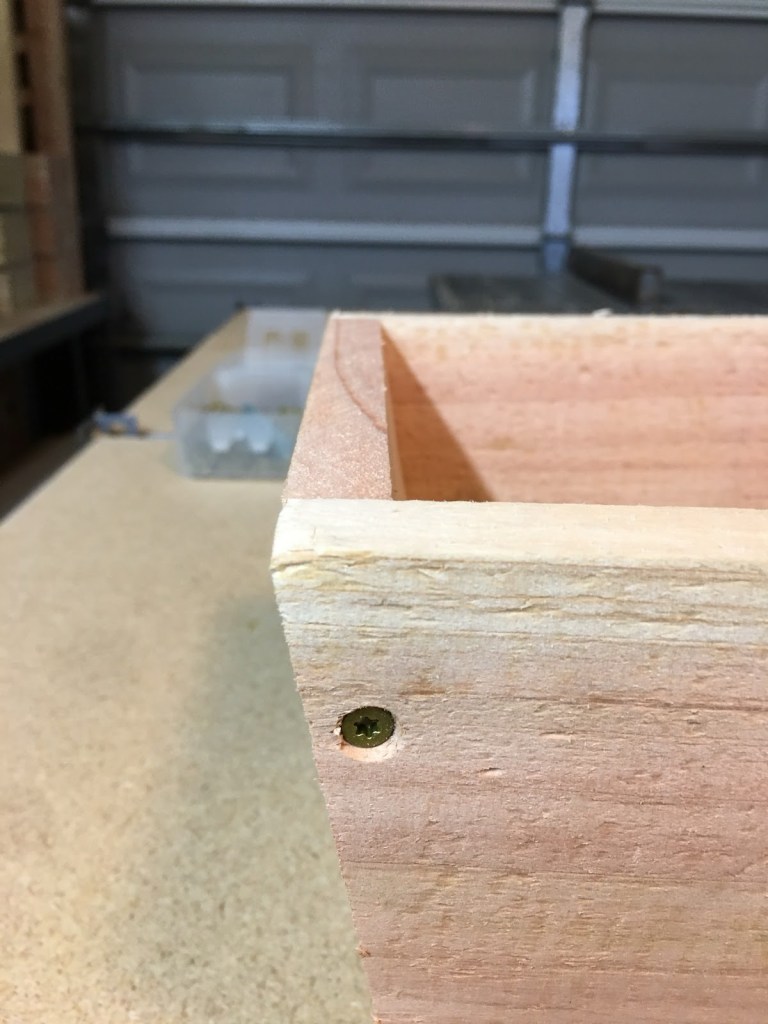
To assemble we’re going to start with what will be the pot. Attach your two sides (part A) to the ends (part B) with the end pieces being on the inside and the top angle flush with the top of each side piece, as shown below. *pro tip: pre drill the holes before screwing thin pieces of wood together. This helps keep the wood from splitting and breaking as the screw tightens up.

Now you should have somewhat of a box, flip it upright so the larger opening is facing up. Place your bottom (part D) into the top and tap it down til it seats all the way flush with the bottom of each side. Attach the bottom (part D) to the sides with two screws on each side.
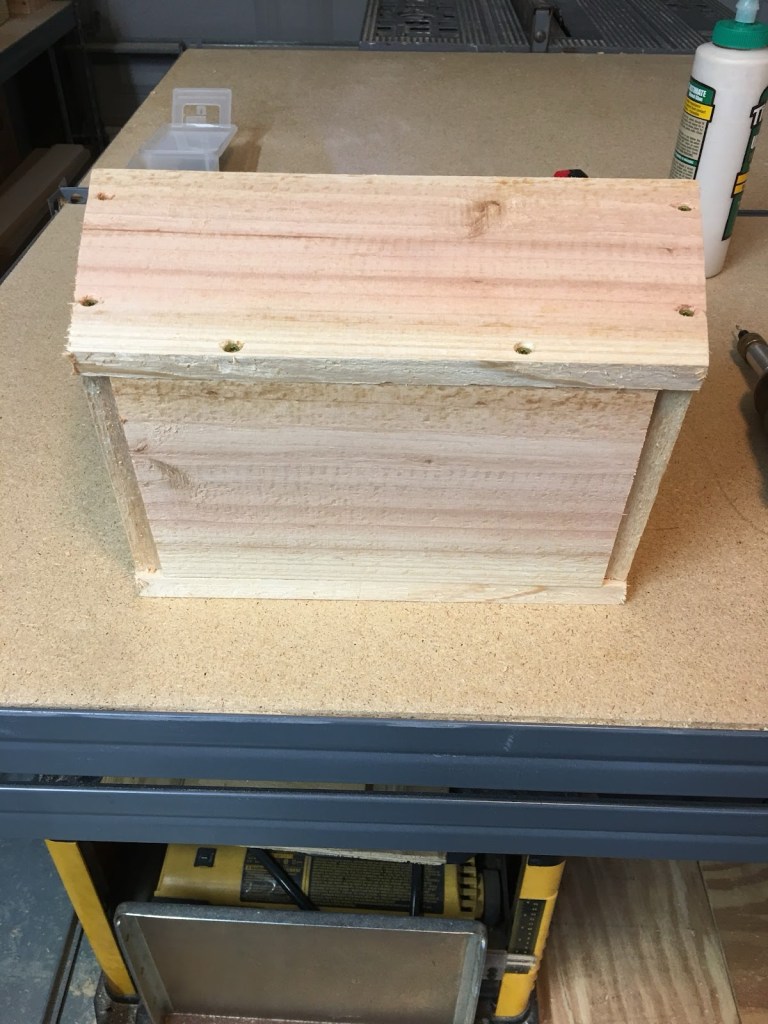
At this point I like to go back over the completed box portion with a sander, just to ensure all my joints and cut ends are smooth.
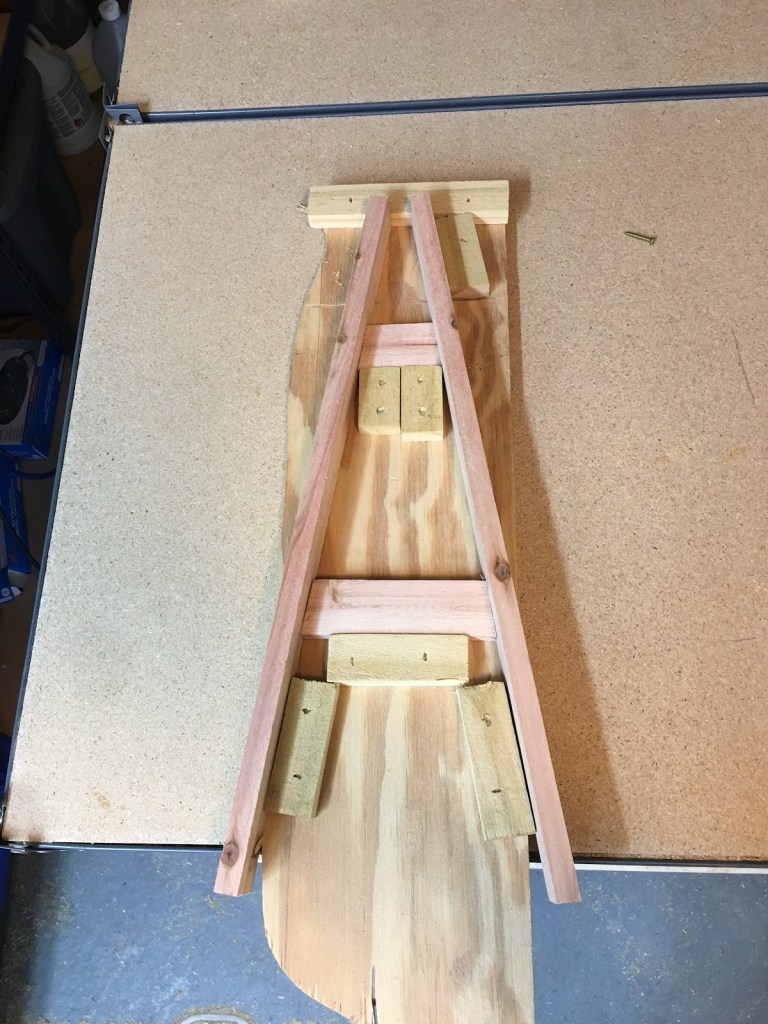
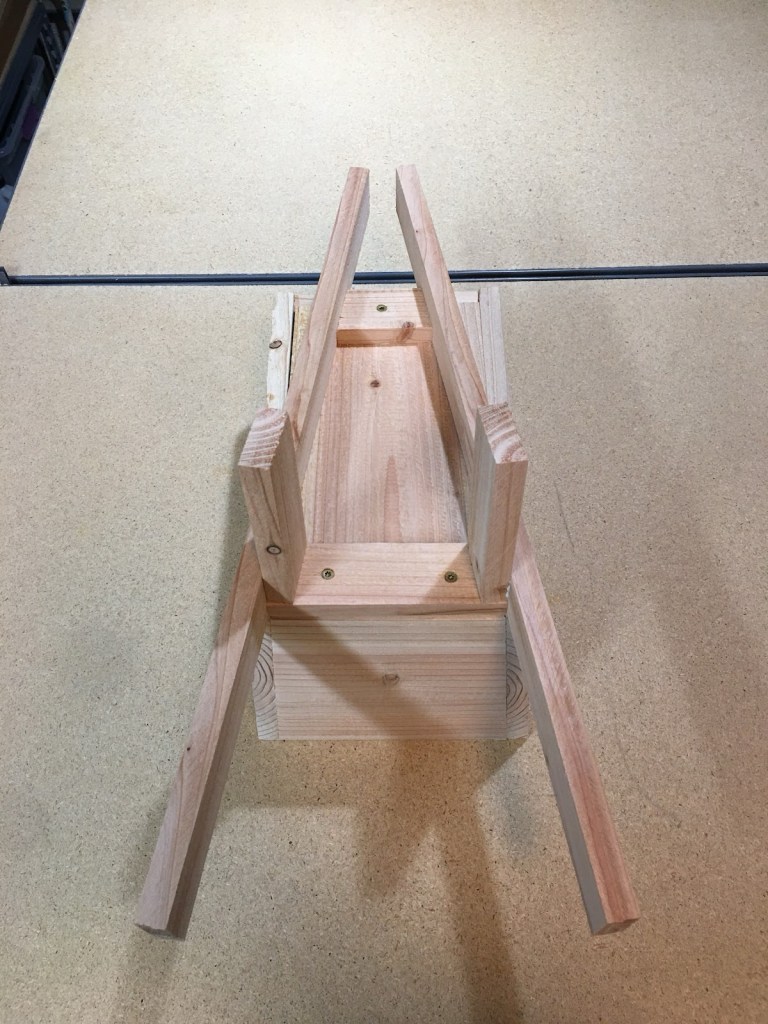
Once we have our box portion complete and sanded smooth it’s time to add some handles and legs. For the next few steps of attaching these, I’ve built a simple jig. This helps speed things up and keep everything consistently aligned when making multiple garden decor items, which you should always consider! More on that here.
If you’re only making one for now though just follow these simple steps.
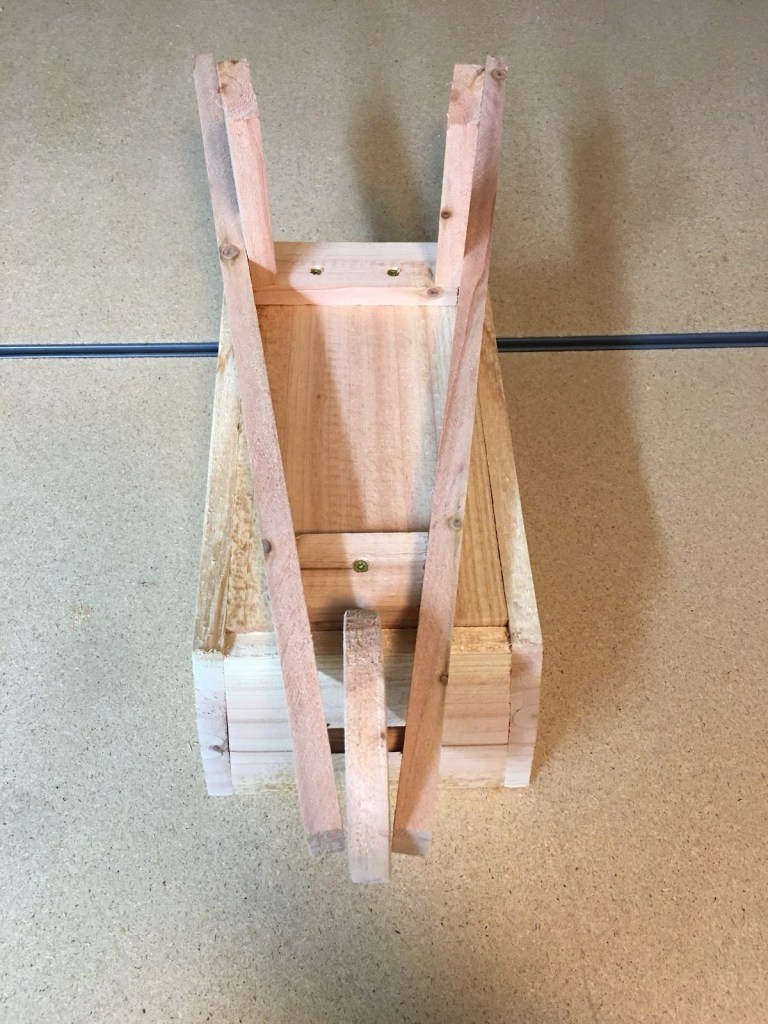
Flip the box over so the bottom is facing up. Attach the back cross brace even with the back of the box and the front cross brace even with the edge of the bottom board (part D.) Make sure to center each piece to the box.
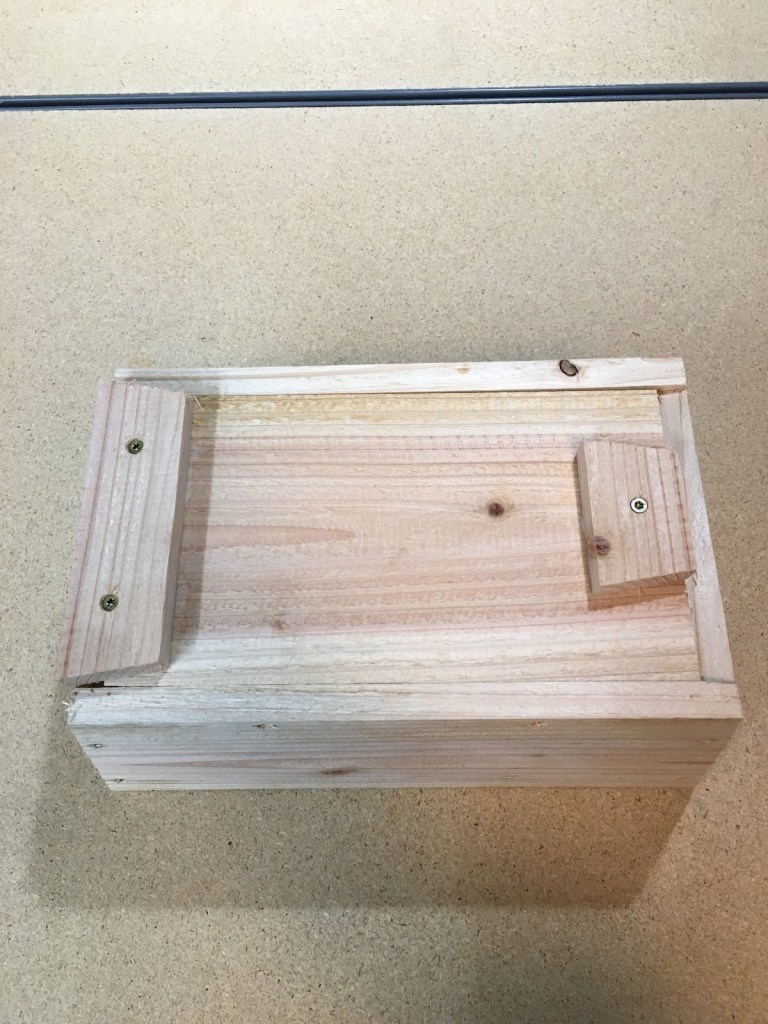
Now measure 5 ½”” from one end of each handle (part E) and put a mark. Attach the handles to the ends of the cross braces on each side so that the mark is even with the back edge of the front cross brace.
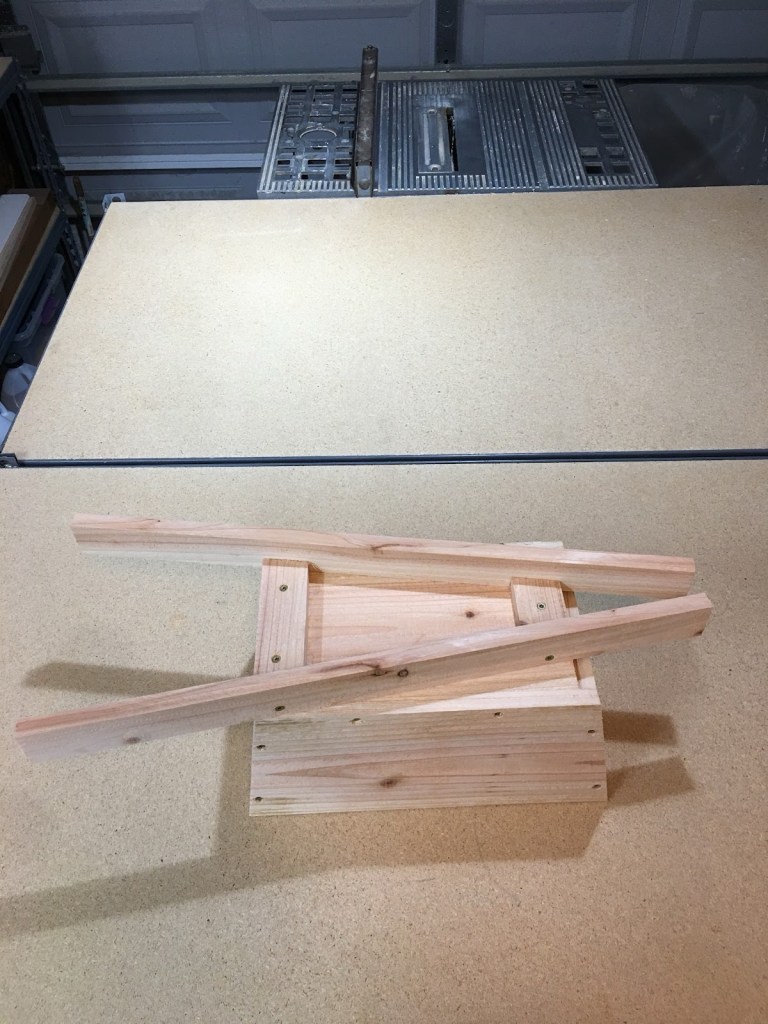
Attach the legs so they are tight in the corner against the handle and back cross brace.
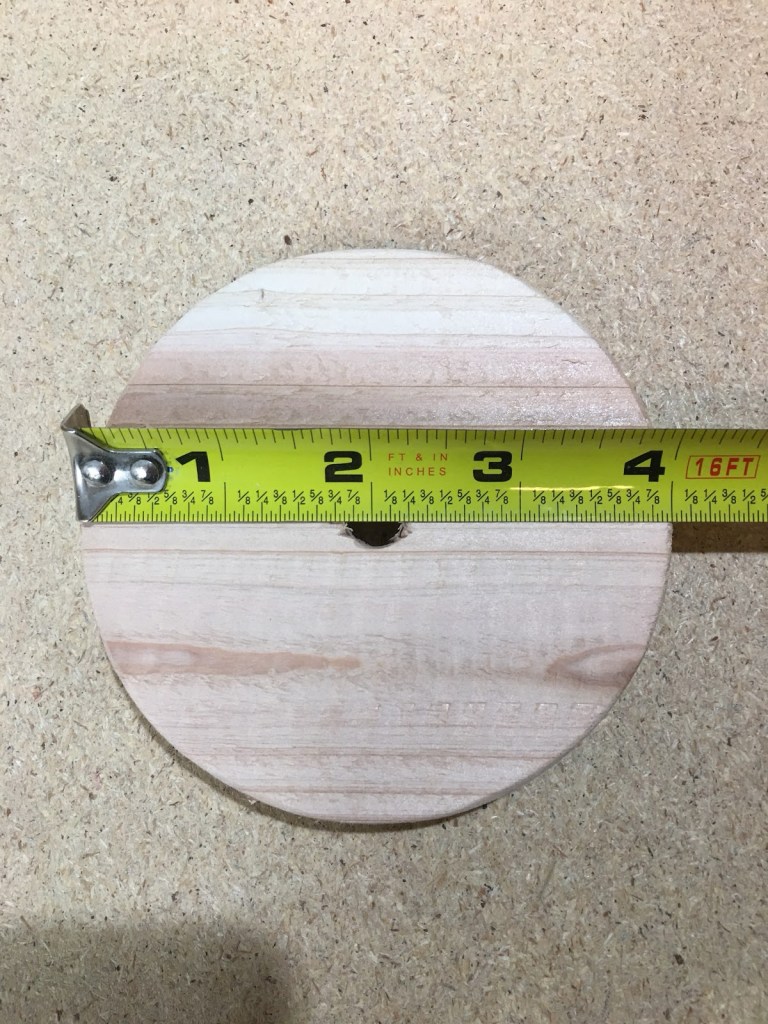
Alright just one more piece! At this point you will have just your 5 ½”x5” piece left. Using a 4 ¼” hole saw, cut a circle from your last piece, this will be the wheel. You can also use a jigsaw to cut out the wheel. Use something round like a roll of tape to trace out a line to follow, but be sure your wheel has a final diameter of 4” so the angle of the legs sitting on the ground will be correct. *Hole saws are measured to the outside so using a slightly bigger diameter will give us the final 4” wheel that we need.
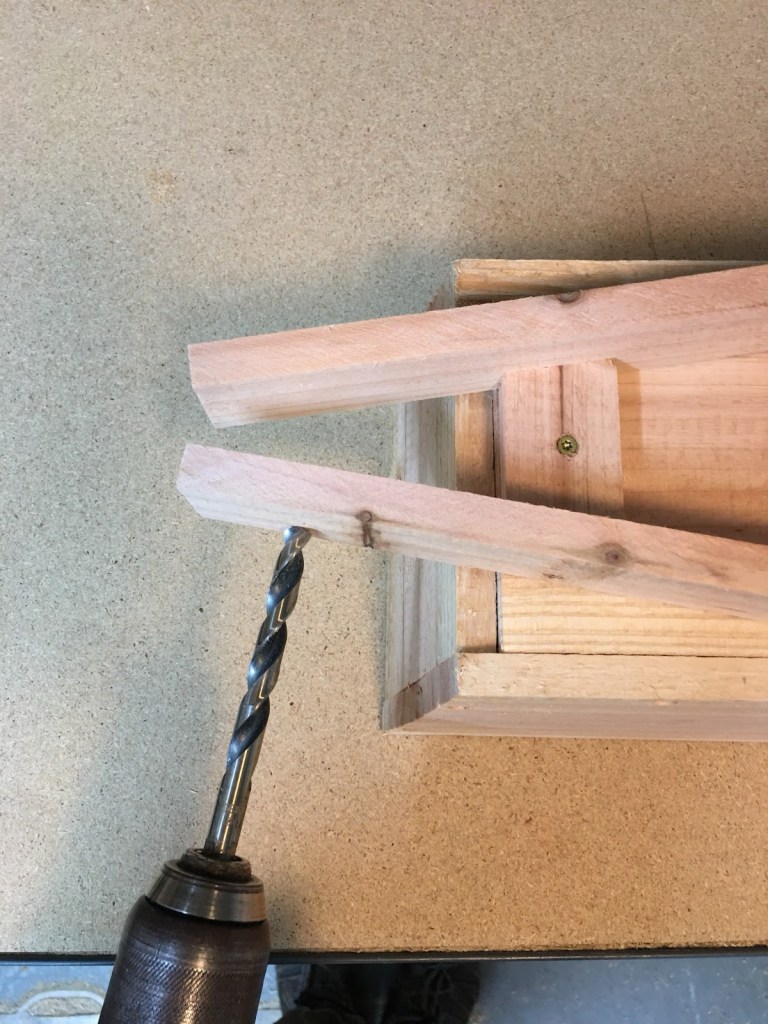
Now mark the location for the wheel by measuring 1 ½” back from the front edge, and to the center of each handle. If using dowel rod to attach the wheel, drill a ⅜” hole on the mark and in the center of the wheel.
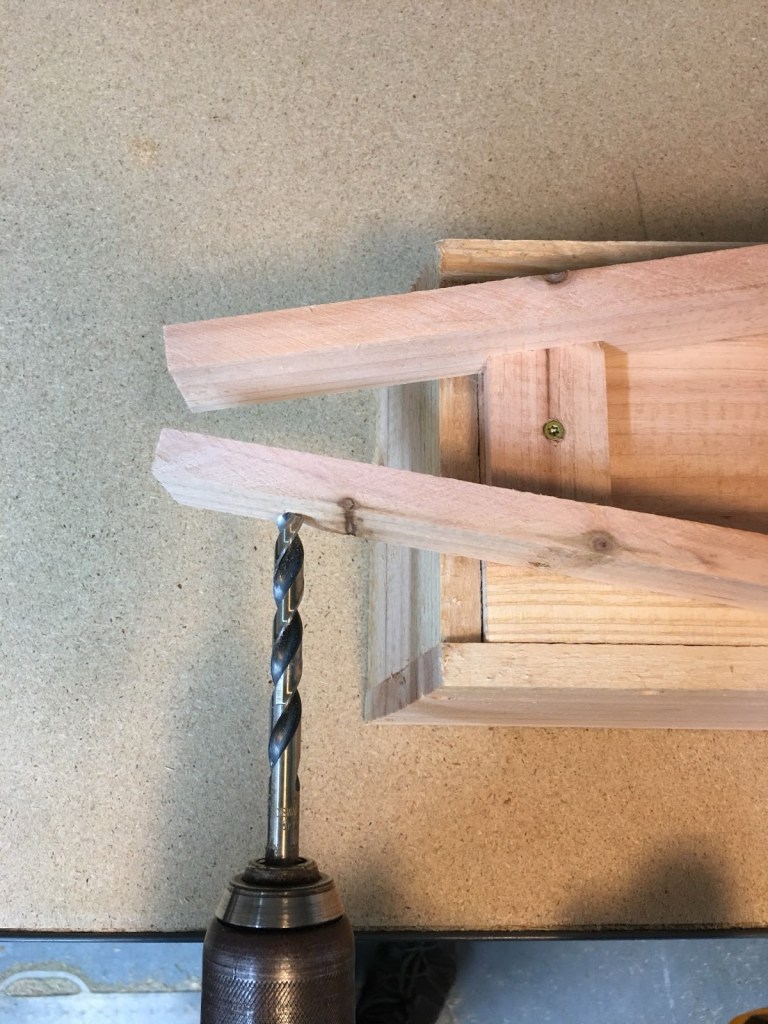
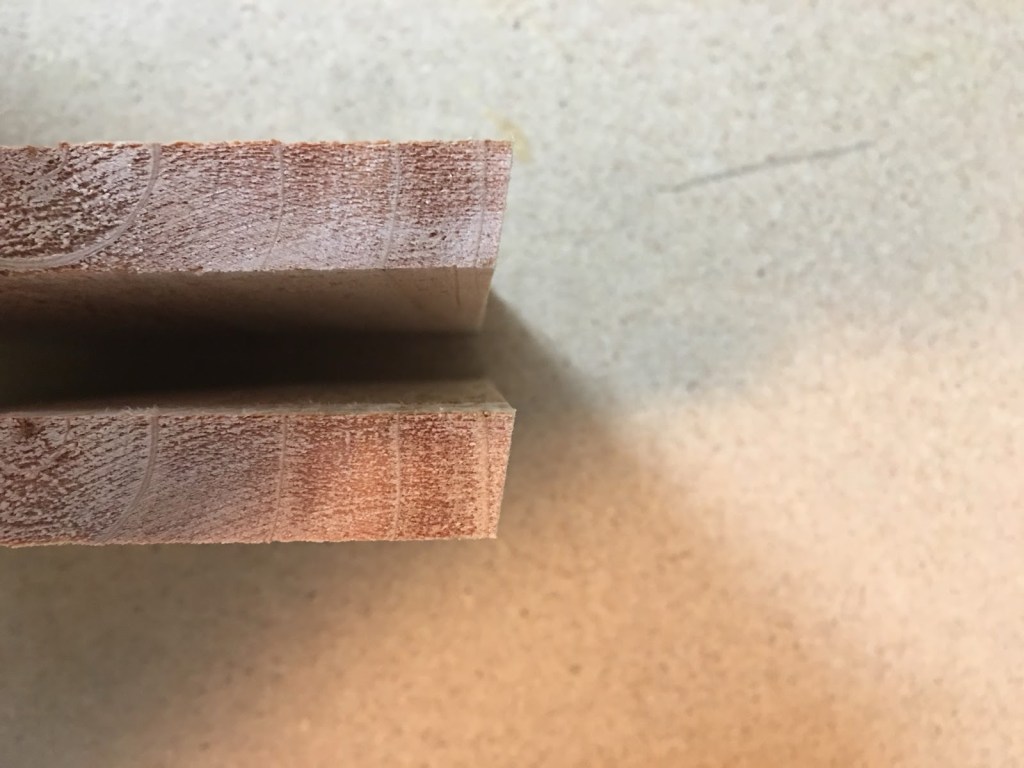
Be sure to keep the drill bit parallel to the front edge of the pot as shown above; and not perpendicular to the board’s face as shown below.
Align the wheel in place and insert the dowel rod so that the angle is aligned with the handles.
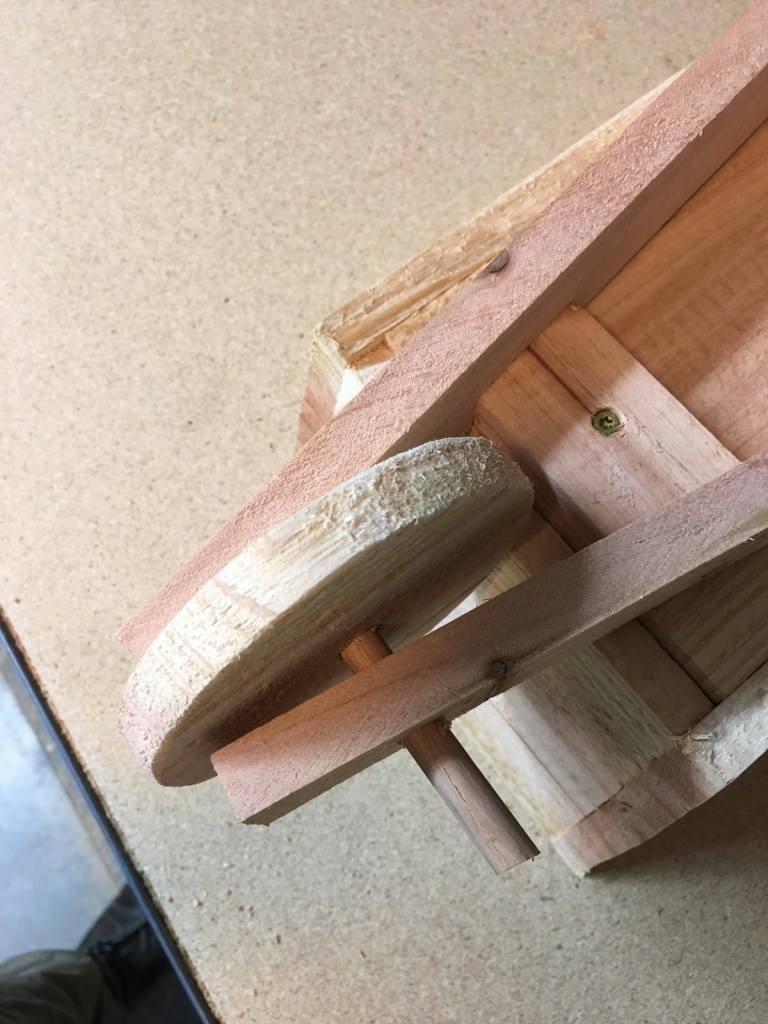
Push the dowel rod through til it’s flush with the outside of the handles. If you’re substituting dowel rod for screws, just simply align the wheel in place and attach it with a screw through each handle at the mark. Go over the handles and the dowel rod ends with a sander to ensure a smooth finish.
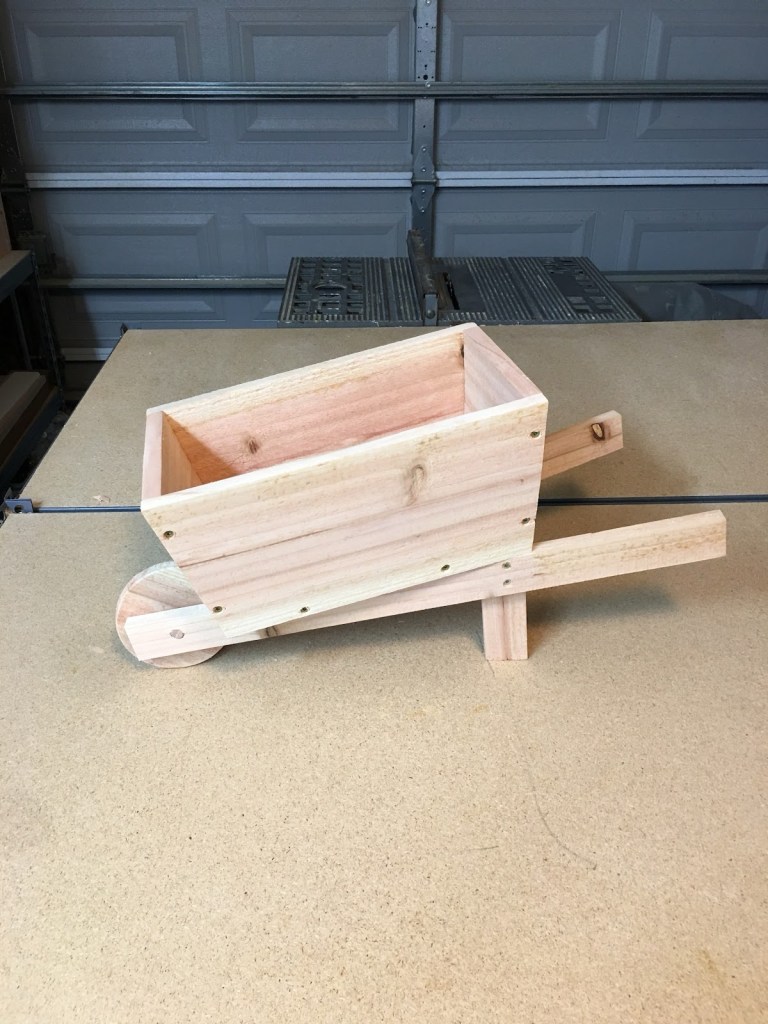
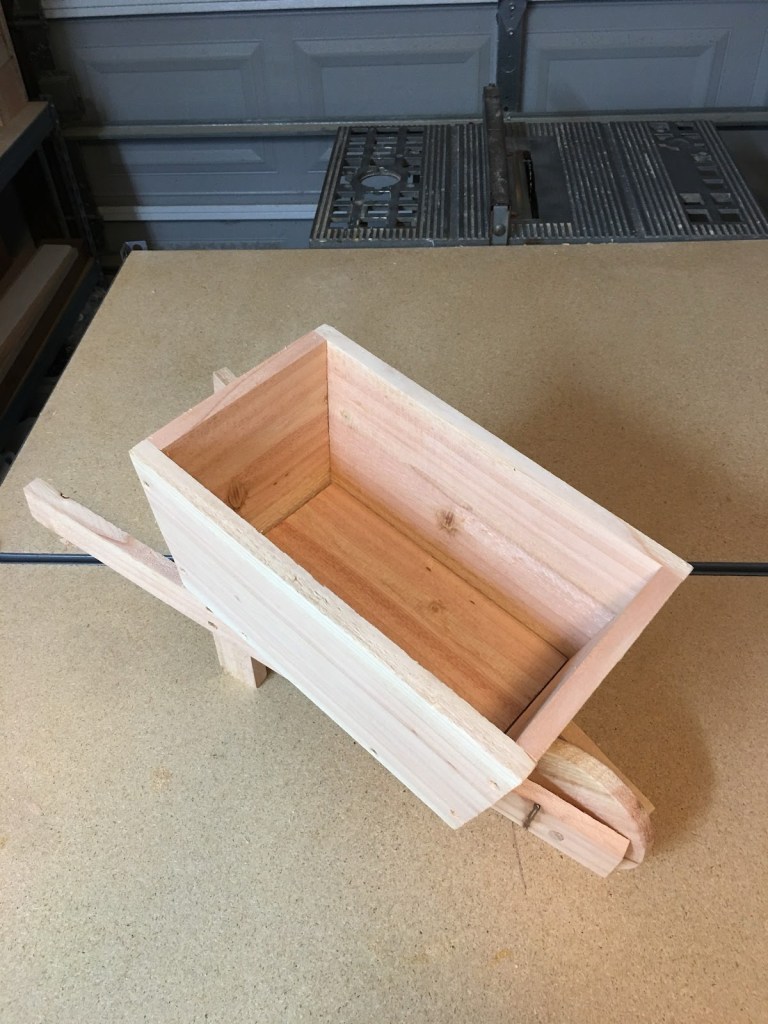
That’s it, you made your very own piece of functional garden decor! Check you out! Now you’re ready to drop in your favorite plant and enjoy the beauty of all your hard work!
We picked cedar for this project for its resistance to pests and rot. It will last a while out in the elements, but to extend the life of your garden decor or wooden outdoor furniture, we always recommend a good oil based sealer like Penofin Penetrating Oil Finish or a coat of polyurethane. This will ensure your projects really stand out and stand up to the test of time!

Leave a comment